
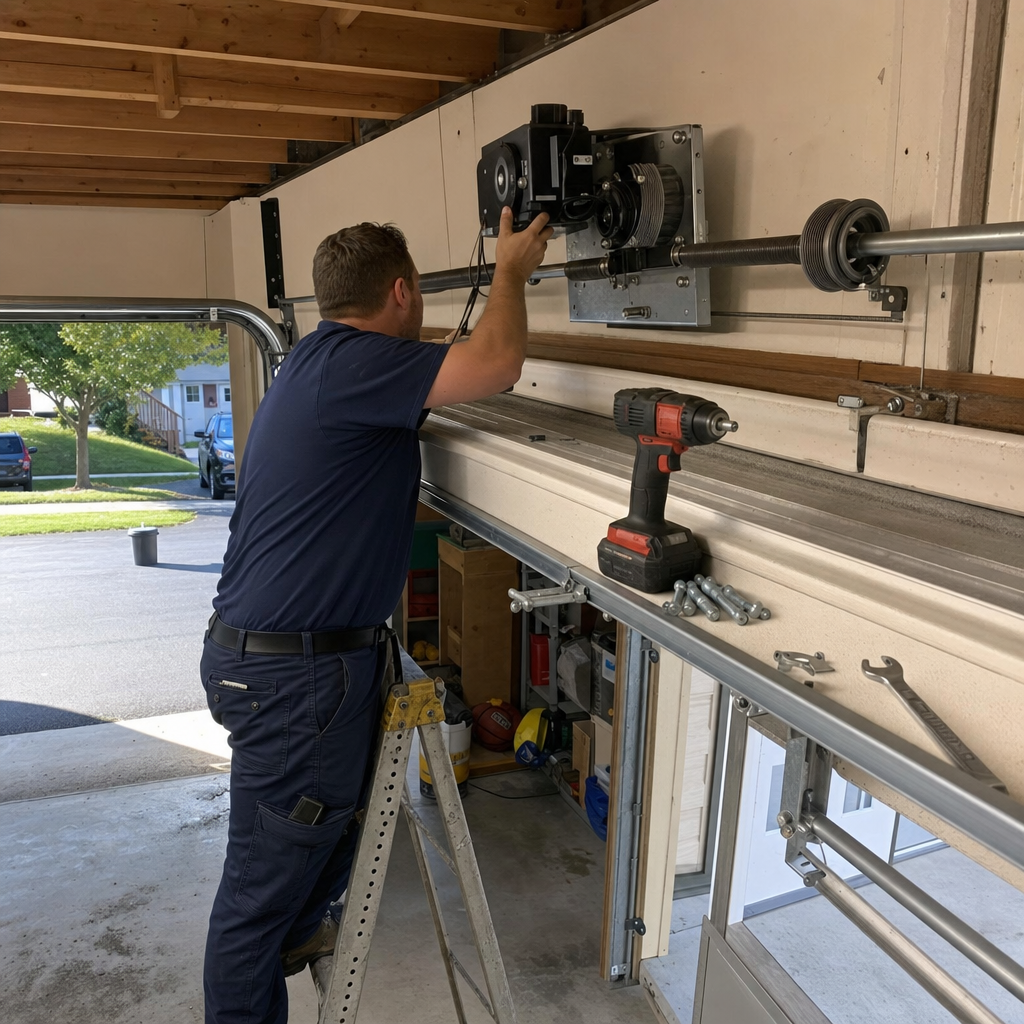
How to Program a Garage Door Opener in Rochester, NY — And Why January Makes It Harder
Programming a garage door opener in Rochester requires pressing the “Learn” button on the motor unit until its LED glows, then pressing your remote button within 30 seconds until the opener lights flash or you hear a click. If your remote programmed fine last spring but won’t take a pairing signal now in January, the remote battery is probably half-dead from the cold — not the opener. Warm the remote in your hand for two minutes and try again before you assume something is broken.
We’re Guardian Garage Door Repair, and we’ve walked hundreds of Rochester homeowners through this exact sequence over the phone. Daniel Lopez, our owner and lead technician, grew up in Swillburg and has spent 14 years troubleshooting openers across Monroe County — from the postwar ranches in Greece with original 1990s Craftsman units to the converted carriage houses in Corn Hill where homeowners juggle three remotes and a HomeLink system. We’ve learned that Rochester’s lake-effect cold doesn’t just snap torsion springs; it quietly sabotages the programming process itself. Here’s what actually works here.
Why the Learn Button Color Matters (And Which Protocol Your Opener Uses)
Most how-to guides skip the single detail that determines whether programming succeeds: the color of your Learn button. On LiftMaster, Chamberlain, and Craftsman openers — the three brands we see most often in Rochester’s 1950s–1970s suburb stock — this button sits on the back or side of the motor housing, sometimes behind a light lens cover.
The color codes the radio frequency and security protocol:
- Purple button: Security+ 315 MHz — common on units manufactured 2005–2011, still prevalent in Irondequoit and Webster split-levels
- Red/orange button: Security+ 390 MHz — pre-2005 units, frequently found in Greece and Gates where original openers outlasted their expected service life
- Yellow button: MyQ Security+ 2.0 — 2011 to present, rolling-code with billion-code encryption; required for HomeLink compatibility in most vehicles 2012 and newer
- Green button: Billion Code (fixed-code remotes) — rare now, but we still encounter these in Park Avenue rentals where landlords never upgraded
Here’s where Rochester’s climate intervenes. Security+ 2.0 (yellow button) uses a more complex handshake between remote and opener. The rolling-code exchange demands consistent voltage from the remote battery. When temperatures drop below 10°F — routine in our January mornings after a lake-effect overnight — alkaline batteries deliver roughly 50% of their rated output. The opener receives a partial signal, attempts the handshake, and fails. You press the button again. And again. The opener’s memory now holds a half-written code entry that blocks further pairing attempts until you clear it.
The fix: hold that Learn button for six full seconds (not the usual three) until the LED goes dark. This wipes the memory buffer. Warm the remote in an inside pocket for five minutes. Then retry the standard sequence. If you’re programming in a detached garage in Corn Hill or the 19th Ward — structures added decades after the main house, often uninsulated — this temperature factor is even more pronounced.
The Three Pairing Scenarios Rochester Homeowners Actually Face
We’ve fielded enough calls to know that “how to program garage door opener” covers three distinct situations. Each has its own failure mode, and each has sent a frustrated homeowner to Google at 10 PM.
New Remote, Existing Opener
This is the classic scenario: your original remote died, you bought a replacement, and now the opener won’t recognize it. First, verify compatibility. A LiftMaster 893LM will not pair with a Chamberlain opener manufactured before 2011, even though the brands share a parent company. The Security+ 2.0 protocol is backward-compatible (newer remotes work with older openers in limited mode), but the reverse is not true.
For Rochester’s older housing stock — those Greece ranches with original red-button openers still clinging to life — you may need a universal remote set to “Billion Code” mode rather than the default rolling-code setting. We’ve walked homeowners through this over the phone; it’s a two-minute fix once you know the switch exists, and impossible if you don’t.
New Opener, Existing Remote Fleet
You replaced the opener itself — maybe after that February morning when the old unit finally surrendered to moisture infiltration from a failed bottom seal — and now your three remotes and keypad need re-pairing. Here’s the sequence we recommend:
- Clear all memory from the new opener: hold Learn for six seconds until LED extinguishes
- Program remotes in order of priority (primary car first, spouse’s car second, keypad third)
- Test each device before programming the next — if one fails, you haven’t contaminated the others
- Program the keypad last; its entry sequence (typically four digits + Enter) writes differently to memory and can conflict with remote pairing if done out of order
Most openers store 40 devices maximum. If you’re moving into a Rochester rental with an existing opener — common in the Park Avenue and South Wedge markets — that memory may already be full of previous tenants’ remotes. The six-second memory wipe becomes essential, not optional.
HomeLink Car Programming
This is where generic guides collapse into confusion. HomeLink — the built-in garage remote in most vehicles — does not program directly to your opener. It programs to your already-paired handheld remote, which then transfers the rolling code to the car.
The sequence: park in the driveway, ignition on (not running), hold the two outer HomeLink buttons until the indicator flashes rapidly (20–30 seconds). Then hold your working remote two inches from the HomeLink mirror and press both buttons simultaneously until the indicator changes from rapid flash to solid, then to slow flash. Finally, press the Learn button on the opener and return to the car to press the programmed HomeLink button within 30 seconds.
In Rochester’s winter, that “return to the car” step often fails because the remote you used for the transfer step now has a cold-depressed battery. We see this weekly. If the HomeLink programs but won’t open the door, repeat the final step with a warmed remote — or call us, and Daniel can talk you through it without a service visit.
When Programming Fails Repeatedly: The Diagnostic Checklist
We’ve narrowed repeated programming failure to four causes, ordered by how often we encounter them in Monroe County:
| Symptom | Likely Cause | Can Daniel Diagnose by Phone? |
|---|---|---|
| Remote LED works, opener Learn LED works, but no click/flash | Cold battery voltage insufficient for handshake | Yes — battery swap or warm-and-retry |
| Remote programs successfully, then stops working within hours | Memory full (40-device limit reached) | Yes — full memory wipe walkthrough |
| Intermittent response: works at 5 PM, fails at 7 AM | Antenna wire pinched or corroded at terminal | Sometimes — visual inspection required |
| Multiple remotes fail simultaneously after power outage | Rolling-code desync or logic board damage | No — opener repair or replacement needed |
The antenna wire deserves special mention for Rochester’s housing stock. In those detached garages added to Victorian homes in Swillburg or Corn Hill, the opener often hangs from a rafter with the antenna dangling through a cobwebbed corner. We’ve found wires chewed by squirrels, pinched by improperly stored ladders, and corroded where the wire meets the logic board from years of humidity cycling. The antenna needs to hang freely, not touching metal, for full radio range. A pinched antenna reduces effective range from 50 feet to 8 feet — enough to make programming seem impossible when you’re standing at the garage door with the remote.
The Cold-Weather Battery Factor: What Rochester Homeowners Should Actually Buy
Here’s the Information Gain most guides miss entirely. For garage door remotes in Rochester’s climate, the battery chemistry matters more than the brand name on the remote.
Alkaline batteries — the AAs and coin cells sold at every convenience store — perform poorly below 20°F. Their internal resistance climbs, output voltage sags, and the rolling-code handshake fails. Lithium primary batteries (not rechargeable lithium-ion, but lithium metal like Energizer Ultimate Lithium) maintain stable voltage to -40°F. They cost roughly three times as much per cell, but in a Rochester garage remote, they’re the correct specification — not a premium upsell.
For the common CR2032 coin cell in compact remotes: lithium formulation is essential. For AA-powered remotes: Energizer Ultimate Lithium or Duracell Ultra Lithium. We keep a supply in our service vehicles because the difference between a “broken” opener and a perfectly functional one is often a $4 battery swap.
Daniel’s observation from 14 years in the field: “Tell me what it’s doing — I’ll tell you what it needs.” A remote that works at noon but fails at 6 AM is almost always temperature-related voltage sag. A remote that never works, even warmed, suggests compatibility or memory issues. The pattern of failure tells the story.
When Your Opener Is Too Old for Standard Programming
In Greece and Irondequoit, we regularly encounter openers installed in the 1990s or early 2000s that use fixed-code systems rather than rolling-code. These units — often Raynor or early Craftsman models — have a set of DIP switches inside the remote and inside the opener power head. Programming means matching the switch positions, not pressing a Learn button.
The security implication is real. Fixed-code systems transmit the same signal every time. A code-grabber device, available online for under $50, can record and replay that signal. If your opener still uses DIP switches, it’s not just outdated — it’s vulnerable. We don’t upsell unnecessarily, but we do flag this honestly: a 15-year-old opener in a garage that connects to your home is a security gap worth addressing.
For these legacy units, universal remotes work differently. You set the DIP switches to match, then use a programming jumper or “code set” button rather than the modern Learn sequence. We’ve talked homeowners through this, but increasingly, the parts availability for these openers makes replacement the more practical path. Garage Door Opener installation in Rochester typically runs $250–$550, including removal of the old unit and programming of your remote fleet.
Common Local Scenarios: What We See in Rochester Neighborhoods
Each part of Monroe County throws its own curveball at opener programming:
Greece and Irondequoit postwar ranches: Original openers from the 1990s, often Craftsman or Raynor, with red or orange Learn buttons. Homeowners buy a new universal remote at Home Depot, try the default rolling-code setting, and get nowhere. The DIP switch or Billion Code setting saves the day — if you know it exists.
Corn Hill and Park Avenue carriage house conversions: Detached garages with no insulation, Wi-Fi dead zones, and HomeLink vehicles parked on the street. The programming sequence requires walking back and forth between car and garage in weather that punishes patience. We keep a short Emergency Garage Door Opener in Rochester, NY same-day window for these calls because we know the frustration.
Webster and Penfield new construction: MyQ-enabled openers with yellow Learn buttons, smartphone app dependency, and homeowners who’ve never held a physical remote. When the app fails after a router reset or power outage, they’re stranded. The physical Learn button still works — it’s just hidden behind a light cover they’ve never removed.
19th Ward and Swillburg rentals: Multiple tenant generations, remotes lost, keypads with forgotten codes, and landlords who’ve never cleared the opener memory. We arrive to find 38 stored devices and a new tenant’s remote trying to squeeze into slot 39. The full wipe and fresh start takes five minutes and prevents mysterious “my opener opened by itself” calls later.
FAQs
Alkaline remote batteries lose significant voltage below 20°F, which interrupts the rolling-code handshake between remote and opener. Warm the remote in your hand or replace with lithium primary batteries rated for sub-zero temperatures. If you’ve tried multiple times, the opener’s memory buffer may hold a corrupted partial entry — hold the Learn button for six seconds to clear it, then retry with a warmed or fresh-battery remote. Call (855) 595-1795 if you’re still stuck; Daniel can often diagnose the pattern over the phone.
Opener repair in Rochester typically runs $120–$320, depending on whether the issue is a logic board, receiver, or antenna replacement. If the opener is more than 15 years old and uses fixed-code DIP switches, replacement may be more cost-effective than repair — Garage Door Opener Installation in Rochester, NY ranges from $250–$550 including programming your remotes and HomeLink. We offer free estimates, and Daniel shows up personally to assess whether repair or replacement makes sense for your specific unit.
No — HomeLink and similar built-in vehicle remotes require a working handheld remote to transfer the rolling code during programming. If your only remote is lost or broken, you’ll need a replacement remote programmed to the opener first, or a service call to reset the system. We stock the Best Garage Door Opener in Rochester, NY compatible remotes for LiftMaster, Chamberlain, Genie, and Craftsman units and can program everything on-site. Call (855) 595-1795 for same-day service in Rochester.
If your opener has DIP switches instead of a Learn button, or if the Learn button is green (indicating Billion Code), it’s a fixed-code system from the 1990s or early 2000s. Universal remotes can still work, but they require manual code matching rather than the modern automatic pairing sequence. More importantly, fixed-code systems lack the security encryption of rolling-code openers. If you’re in a Rochester neighborhood like Greece or Irondequoit with original postwar hardware, we can evaluate whether a modern opener installation is the smarter long-term investment — call (855) 595-1795 for a no-pressure assessment.
When to Call Guardian Garage Door Repair
Some programming failures are simple — a cold battery, a full memory, a hidden Learn button color. Others signal failing hardware: a logic board with cold solder joints that contract and lose connection, a receiver module degraded by years of voltage fluctuation, or an opener that simply reached end-of-life after 10,000 cycles in Rochester’s freeze-thaw climate.
We’re not a dispatch center sending whoever’s available. Daniel Lopez, our owner, leads every technical call — 14 years of focused garage door work, 434 reviews at 4.8 stars, and the same hands-on approach whether he’s walking you through a battery swap by phone or replacing a logic board in your Greece ranch garage. We work on your brand: LiftMaster, Chamberlain, Genie, Clopay, Amarr, Wayne Dalton, Craftsman, and Raynor. When your door won’t move, we do.
If you’d rather have it looked at, Guardian Garage Door Repair Greater Rochester offers a no-pressure assessment in Rochester — call (855) 595-1795.
Written by Daniel Lopez, Owner & Lead Technician at Guardian Garage Door Repair Greater Rochester, serving Rochester, NY.